First let me begin by sharing with you that #1 I am new to the hair obsessed club and still learning from my "Hair Heroes" and #2 I am a working mom (who by the way is NOT a morning person!!!) I am finding that practice makes perfect better. Meanwhile my girls and I are enjoying our time together and we invite you to join us on our journey. Sometimes we do fancy and sometimes we flop but for us it's the process.
Monday, November 8, 2010
Daddy Daughter Dance

Tuesday, December 22, 2009
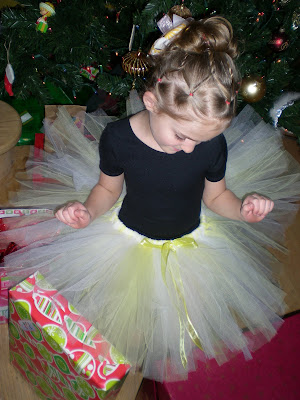
My Princess Models her Tutu from Tutubug!


Fancy Updo for a Special Occasion


We only wash her hair about 2 times a week right now. Unless I’m doing something really special I don’t always put that much product in her hair and it doesn’t seem to need washing more often - especially as our house is so dry.
I made a pony tail in the middle of her head trying my best to leave an even ring of hair all the way around. I clipped it out of my way.

Then I put sections into pony tails. I didn’t do anything fancy here, just tried to make them pretty even all the way around her head. Her hair is pretty long so I kept wrapping the mini pony tails around her bun to keep them out of the way.

Then I split the ponies and made the twist braids. I wasn’t sure how far to braid so each of my twist braids ended up being different lengths.
 They weren’t as tight as I’d like them, but I was able to fix that when I put them in the big ponytail. To hold them in the right positions, I bobby pinned them down until I had the elastic secured.
Then I took all of the ends of the twist braids and pulled them together and bobby pinned them out of the way.

Next I started making loops as I would in making a flower bun. I only worked on the top half of the flower. I looped each section of hair only once and left the rest of the hair to hang down.

Then I let the ends dry and curled them with a flat iron.
 I covered up the ends of the twist braids with a flower clip.
I caught her admiring herself in the mirror! Too cute!

Wednesday, December 16, 2009
Wednesday Morning (Day #3)
My Goal for the Week - How many days can I reuse/recycle the hairstyle ?!?!
Day #3
 With only a four day school week I'm trying to get a much bang for my buck with the girls' hair.
Category: 3rd Day ‘Do
Time: 5-7 minutes in the morning
Needed: pony weaves from the nights before, two elastics, brush, comb, hairspray, flower (optional)
I kept Little Bird's hair in from the last two days, see link here for yesterday and here for the Monday. This morning (at last night's request mind you) I brushed her hair and french braided it. I did not wet down all of her hair, I did wet the comb and just wet down any fly away wispies. Little Bird specifically asked for flowers in her hair – last night - and I held her to it!

I hairsprayed it and added the flowers and that was it. It still looked pretty good. Tonight I cut out all the elastics with a seam ripper. We'll see the state it is in tomorrow morning. She requested just two plain pony tails and flowers. We shall see.
- I will continue this post tomorrow by added Princess's hair from today. Sandman is calling. . .
Sunday, December 13, 2009
How to Create your own Flower Clip!
Think garage sale, bargain bin, Salvation Army, old flower arrangements on top of your local craft store. The flower I use in this slide show came in a big bunch from Kmart for $3.00.
You would laugh if you saw my first attempt at making these. Fortunately they were all dismantled and I started over, using a better technique and better supplies. Here is a little tutorial that I'd like to share. I've had lots of practice as I been working on dozens of bows and flowers that will shortly become gifts for little girl friends. . . I hope this helps.
 |
| Make a Smilebox slideshow |


