First let me begin by sharing with you that #1 I am new to the hair obsessed club and still learning from my "Hair Heroes" and #2 I am a working mom (who by the way is NOT a morning person!!!) I am finding that practice makes perfect better. Meanwhile my girls and I are enjoying our time together and we invite you to join us on our journey. Sometimes we do fancy and sometimes we flop but for us it's the process.

Showing posts with label curls. Show all posts

Wednesday, November 10, 2010

The Birthday Updo

The Princess loves an updo with the works! Usually we find ourselves doing a version of the flower bun and spiral ringlets. Getting a little bored, I like how the top of this do adds some fun.
Image and video hosting by TinyPic
We sectioned off the top and twisted them combining them into twist braids that we added to the ponytail we had already created. It's nice having a big collection of bands, we used a big one for the big ponytail and an elastic to secure the twist braids.
Image and video hosting by TinyPic
Then I only created the top of the flower bun, leaving the rest of the hair to hang long and then curl with the spiral curling iron. I like doing this occasionally so one can get a sense of how long her hair is. Someday she'll probably want to cut it, but hopefully that day is far, far away. Meanwhile, she loves having long hair!
Image and video hosting by TinyPic
This was the perfect 'do for a special outing to "Build-a-Bear" and then to the Melting Pot for a chocolate dessert! Yum!

Monday, November 8, 2010

Daddy Daughter Dance

These pictures are from last May and I'm finally posting them:
Image and video hosting by TinyPic
Little Bird was actually very cooperative. We washed and dried her very thick hair, using a round brush to straighten it and put a curl at the end. It has natural curls on the underside and can be very unruly. After pulling it back into small ponytails we put some curls in using the spiral curing iron.
Image and video hosting by TinyPic
Princess wanted a fancy updo - of course! We pulled it back into a ponytail. Then we put most of it up into a flower bun. The remaining hair and ends from the flower bun were curled with the spiral curling iron. The tiara and flower were the finishing touches. The flower made it through the night, the tiara did not!

Just for kicks I thought I'd share our little Dancing Queen doing her thing! We've always said she dances to the tune of her own orchestra.

Thursday, December 31, 2009

New Years Eve Do's

Little Bird's 4 knots and ponies - with curls to boot!
Little Bird asked me why I copy other peoples styles from their websites. . . well, I guess because they are so darn cute! I did use another site as an inspiration, I just discovered Piggies 'N Ponies and did a variation of her 3 knots and a pony.

I started with wet hair that I parted on a diagonal into four sections. Then in each of the sections, I divided it into two, made a knot on the front and then pulled that into a ponytail in the second section.

After it dried - I let it mostly air dry and then blow dried the last little bit, Little Bird actually let me curl her hair! She has VERY thick hair and I'm finding it hard to curl her hair with the flat iron, however, my new spiral curling iron worked great. I curled most of her hair under and spiral curled the top layer and the four pony tails.

The finished look was charming AND it stayed out of her face all night. We'll see what it looks like in the morning.

The Princess - our version of the "Curvy-Swirvy New Year's Updo"

I love that name! It was my first try and it turned out pretty good, not quite as awsome as THE MOM over at Babes in Hairland, but not bad for my first try. It'll be much better next time;-) Many thanks to my Hair Hero: The Mom at Babes in Hairland! She posted this style yesterday (you can see it here) and my princess loved it. My little one told me it goes really well with her fancy dress. I think she looks very grown up. This would really be a terrific flower girl do! At least the way THE MOM does it, like I said, my next time will be better.

Saturday, December 26, 2009

Christmas Eve, Christmas Day 2 Day Fancy Do

Christmas Eve: Super Fancy Do!
I didn't take pictures of all the steps but I will explain as best I can:

After washing her hair I put mouse in it. Honestly, I am still learning all my hair products and in a process of experimentation, but the mouse seemed to work well.

I divided the front of the hair that I wanted to be the hair headband and I clipped it out of the way. After I did the upside down french braid I worked on these - I will explain in better detail farther down.


I then had my princess lay face down on the bed with her head hanging over the side. You can see step by step directions of this at Its a Girl Thing blog here. Her hair was damp and I french braided it from the neck up to the crown of her head. My first try of this actually turned out better than this day - come to think of it, the upside down french braid might have been overkill - but I had an idea in my head. . .

Then I put an elastic around the end of the french braid right at the head and left all the hair hanging down. I clipped it out of the way so I could work on the hair headband.

First I made the side part and another part about an inch away. This is where I made the three little braids. We did this a few weeks ago and the princess LOVED it. She wore those braids for 3 days!

I put in gel and made sure her hair was wet as I combed in smooth over the sides of her head and behind her ears. I attached both sides just under her right ear with a small elastic. The braids and their elastics were in that little pony but that looked fine.

Next I worked on a partial flower bun. I used half of the hair in the ponytail on the top of her head and began making loops. I used the flat iron to smooth out the hair. My loops were exaggerated and very large. I was going for an over the top hairdo for this day. I will say that the flower bun didn't make it all the way until midnight, but it lasted most of the evening. I secured the loops with bobby pins. My little one has extremely long hair although not especially thick, so I reused some of the hair to make more loops and I left some of it to curl down the side.

We got to try out our new spiral curling iron - it worked really well!

I finished everything off by bobby pinning in some fun silver glittered Christmas decorations that I picket out to go with my little one's dress and I made the ribbon with some scrap ribbon that came off a bouquet of flowers I bought last week and another decoration I hot glued on.


All in all I had one happy little princess who felt like the belle of the ball!
Day 2: Fancy Do

On Christmas we were all exhausted from our night before. We didn't get home until after 1:00 a.m. and the last thing I wanted to do this day was spend a long time on another fancy do - so we recycled!

This picture was taken after our little one had already been running around the house with cousins for over an hour.

The do:

I redid the hair headband, wetting it down, recombing and fastening it with an elastic near her ear again.

Then I took out the upside down french braid and brushed it out. I took the top section and flat ironed it, it was really bumpy from the night before. You can't see our little one's poof - she'd already been running around with cousins for an hour by this time, but I back combed her hair into a poof and smoothed the freshly flat ironed hair over it. It was also weighed down by the large bow from the night before.
I did slightly more haphazard ringlets in her hair this evening and called it terrific!


Day 1 & 2 - If you use enough hairspray it works for both;-)


The picture above is from Day 1 and the bottom picture is from Day 2 after an hour running through the house with cousins. I LOVE this style. Also, my little bird has shoulder length hair - this is a fabulous style for short hair!

I did this style for my oldest when she was in a play earlier this month. I got the style from a favorite hair blog of mine: Girly Do's by Jenn, and you can see the step by step directions here.

I use four pony tails instead of the three shown in Jenn's blog and I section it off the night before and put it in curlers while it's still damp. This turned out much better than my first and second tries:

The ribbon is probably two yards long and I'm sure I used over 40 bobby pins. I didn't put the flowers in for Christmas. On Christmas I made the loops bigger - especially in the front, I liked how it looked much better.
See - practice makes perfect better!

Tuesday, December 22, 2009

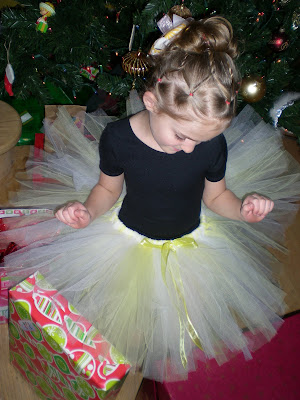
My Princess Models her Tutu from Tutubug!


Our tutu from tutubug arrived today! Princess dissappeared upstairs during the end of our gingerbread house making and when she returned she was in her tights and leotard ready to model her new tutu for us!


Her hairstyle from yesterday still looked great today as well.


Many thanks again to tutubug and Shaunell!

Fancy Updo for a Special Occasion


We had time today and I wanted to see how my princess’s hair looked in an awesome style first seen on The Princess and her Hair blog that you can check out here. My little one has very long hair but it isn’t extremely thick – although closer to her scalp it is finally thickening - a good sign as she is six now. I decided that I’d do a few things different and being new at hair I’d need some practice making it look alright. I began by washing and conditioning her hair.


We only wash her hair about 2 times a week right now. Unless I’m doing something really special I don’t always put that much product in her hair and it doesn’t seem to need washing more often - especially as our house is so dry.

I made a pony tail in the middle of her head trying my best to leave an even ring of hair all the way around. I clipped it out of my way.

Then I put sections into pony tails. I didn’t do anything fancy here, just tried to make them pretty even all the way around her head. Her hair is pretty long so I kept wrapping the mini pony tails around her bun to keep them out of the way.

Then I split the ponies and made the twist braids. I wasn’t sure how far to braid so each of my twist braids ended up being different lengths.

They weren’t as tight as I’d like them, but I was able to fix that when I put them in the big ponytail. To hold them in the right positions, I bobby pinned them down until I had the elastic secured.

Then I took all of the ends of the twist braids and pulled them together and bobby pinned them out of the way.

Next I started making loops as I would in making a flower bun. I only worked on the top half of the flower. I looped each section of hair only once and left the rest of the hair to hang down.

Then I let the ends dry and curled them with a flat iron. I covered up the ends of the twist braids with a flower clip.
I caught her admiring herself in the mirror! Too cute!

Monday, December 14, 2009

Monday Morning

My Goal for the Week - How many days can I reuse/recycle the hairstyle ?!?!

First let me begin by sharing with you that #1 I am new to the hair obsessed club and still learning from my "Hair Heroes" and #2 I am a working mom (who by the way is NOT a morning person!!!)

The Princess

My 6 year old is happy to sit for me as long as I made her hair pretty. She loves all things pink and sparkly.

Category: Overnight Prep Hairstyle
Time: 20+ minutes night before, 5-7 minutes in the morning

I'll begin with Princess's hair today: I had a vague idea in my head and was pleasantly pleased with the end results!


I began after her bath last night:

I put gel in her hair and I sectioned off several small sections along the front and made twist braids on each.

She looks a little spider like here don'tchathink?


I loosely twisted all the hair and put it in a pony tail/bun for the night. It was pretty wet. The first picture was from last night and the next from this morning after she slept on it.


Princess's hair was still a little damp this morning when I took it out of the ponytail. So after I took it out I dried it some more using the diffuser. I didn't even brush the ends of her hair. The curls were quite nice after I dried them.

Then I pulled her hair - minus the twist braids - into a pony tail securing with a pony tail holder.

Then I added in the twist braids and added another pony tail. You can see the two different colors of pony tails I used. Then I attached a bow. I actually attached it to the pony tail holder so as not to show. Next time I'll use smaller or hair colored pony tail holders.


I'm thrilled with how it turned out. I'm especially happy with the overnight twist that resulted in curls. BONUS!I can't wait to see how I can recycle this style tomorrow morning. . .


Little Bird

This is my older daughter, age 9. She is a sport girl who occasionally tolerates me doing something with her hair.

Category: Overnight Prep Hairstyle
Time: 20+ minutes night before, 5-7 minutes in the morning

This is my version of a "It's A Girl Thing" post from September, 9. I made 4 little messy buns because Little Bird's hair is pretty short. I also would have liked to flat iron all of her hair but my grumpy girl was actually growling at me this morning so after I finished the messy buns I called it DONE!

I began last night after bath time. I put gel in Little Bird's hair. Then I did a diagonal part and made 6 pony tails on each side.


I made all the pony tails with red elastics and then used green to show where I attached the twisted pony to the next pony. It's hard to tell, but I twisted each pony to keep the short hairs under control.
The second picture shows the weaves a little better.


Last night I did some messy buns just to see what they'd look like.

They were very messy Messy Buns.

I did not do, perhaps, the best job explaining this style. Post any questions or visit "It's A Girl Thing" for great step by steps.


I'm looking forward to trying something next tomorrow with the back as I'm going to leave in the elastics as long as I can this week.